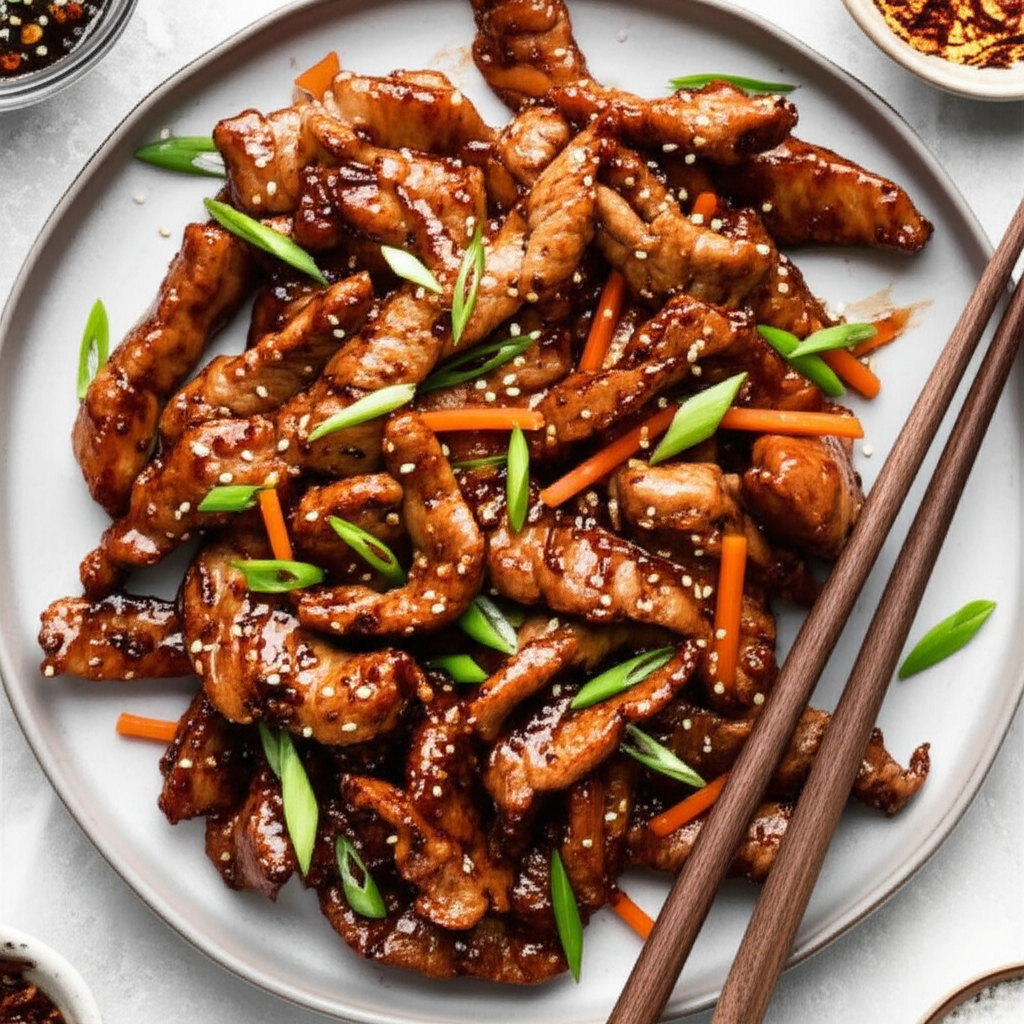

Ingredientes para Authentic Chinese Garlic Pork
- 1 lb pork shoulder
- 2 tablespoons fresh ginger, grated
- 10 cloves garlic, minced
- 1/2 cup soy sauce (for marinade), 1/4 cup soy sauce (for sauce)
- 1/4 cup brown sugar
- 1 teaspoon black pepper
- 1 1/2 teaspoons salt (for preparing pork), 1 teaspoon salt (for marinade)
- 1/4 teaspoon red pepper flakes (for marinade), 1/2 teaspoon red pepper flakes (for sauce)
- 1 egg
- 1/2 cup oil (for marinade), oil for frying (approximately 2 inches deep)
- cool water (as needed for preparing pork), 1/2 cup water (for sauce)
- 1 tablespoon cornstarch
- 2 tablespoons vinegar (rice vinegar preferred)
- 1 tablespoon fish sauce
- 1/2 teaspoon chili pepper flakes (optional, as alternative to red pepper flakes for sauce)
- Carrot
- 1/2 teaspoon sesame seeds (optional, for garnish)
Cook Smarter with Sous, Your Kitchen Companion
Missing an ingredient for this Authentic Chinese Garlic Pork? Need a perfect wine pairing or a healthy side dish idea? Don't guess—ask Sous! Your AI-powered sous-chef is ready to help you swap ingredients, adjust serving sizes, and discover flavor tips in seconds.
Cómo preparar Authentic Chinese Garlic Pork
- **Prepare the Pork:** Place 1 lb pork shoulder in a bowl, cover with cool water, and add 1 1/2 teaspoons salt. Gently rub the salt into the pork and let it sit for 15 minutes. Rinse thoroughly under clean water.
- **Slice the Pork:** Slice the pork into 1/4-inch thick pieces, approximately 1 inch square.
- **Marinate the Pork:** In a non-metallic bowl, combine the marinated ingredients (see below). Add the sliced pork and mix well to ensure all pieces are coated. Marinate in the refrigerator for at least 6 hours, or preferably overnight. The longer it marinates, the better the flavor!
- **Fry the Pork:** Heat 2 inches of oil in a deep frying pan or wok over medium-high heat. Fry the pork in batches until golden brown and crispy. Remove with a slotted spoon and place on a wire rack or paper towel-lined plate to drain excess oil.
- **Make the Sauce:** In a small saucepan or microwave-safe bowl, whisk together all the sauce ingredients (see below). Bring to a boil, whisking constantly to prevent lumps. Set aside.
- **Serve:** Serve the golden-brown garlic pork hot, drizzled with the savory sauce. Enjoy with your favorite sides like fried rice, noodles, or Chinese garlic broccoli.
Nutrition Information (Approximate per serving)
Sodium
44 g
Sugar
73g
Fat
42g
Carbs
9g


