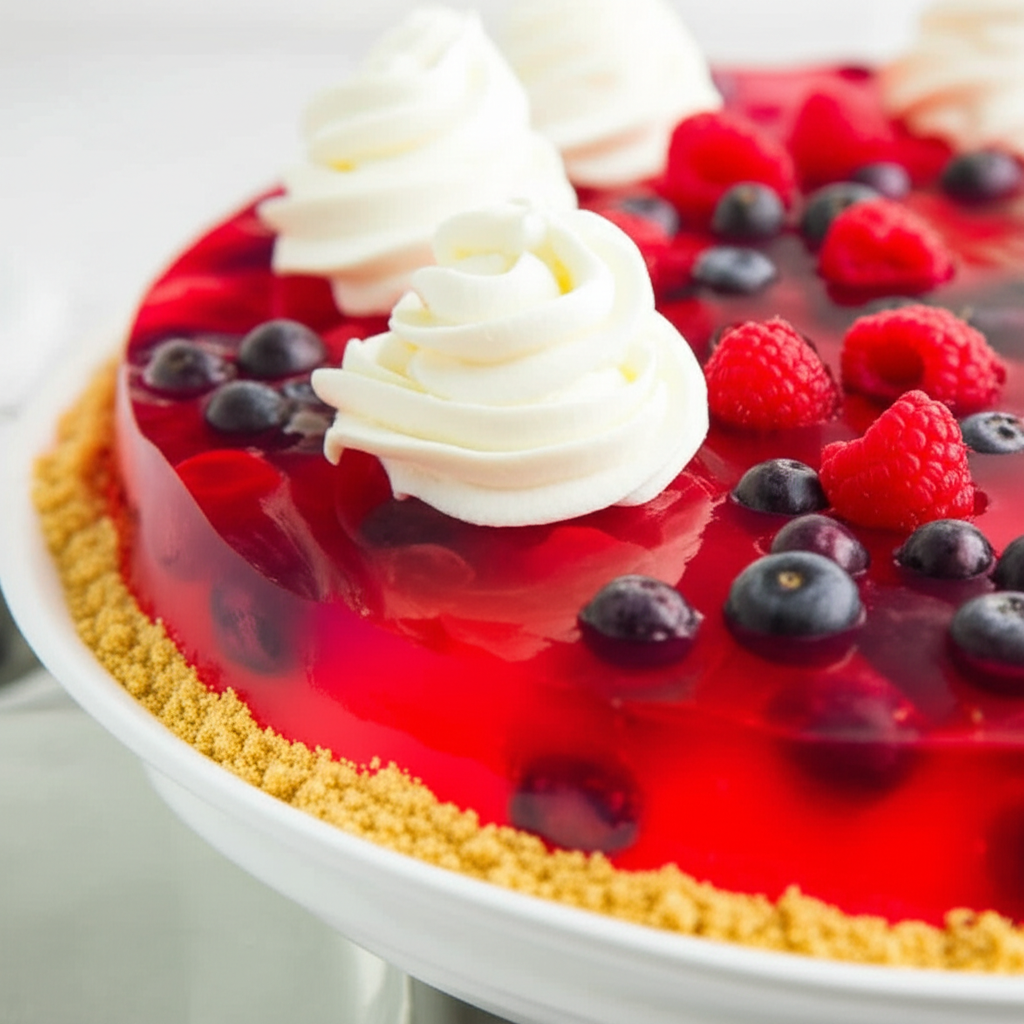
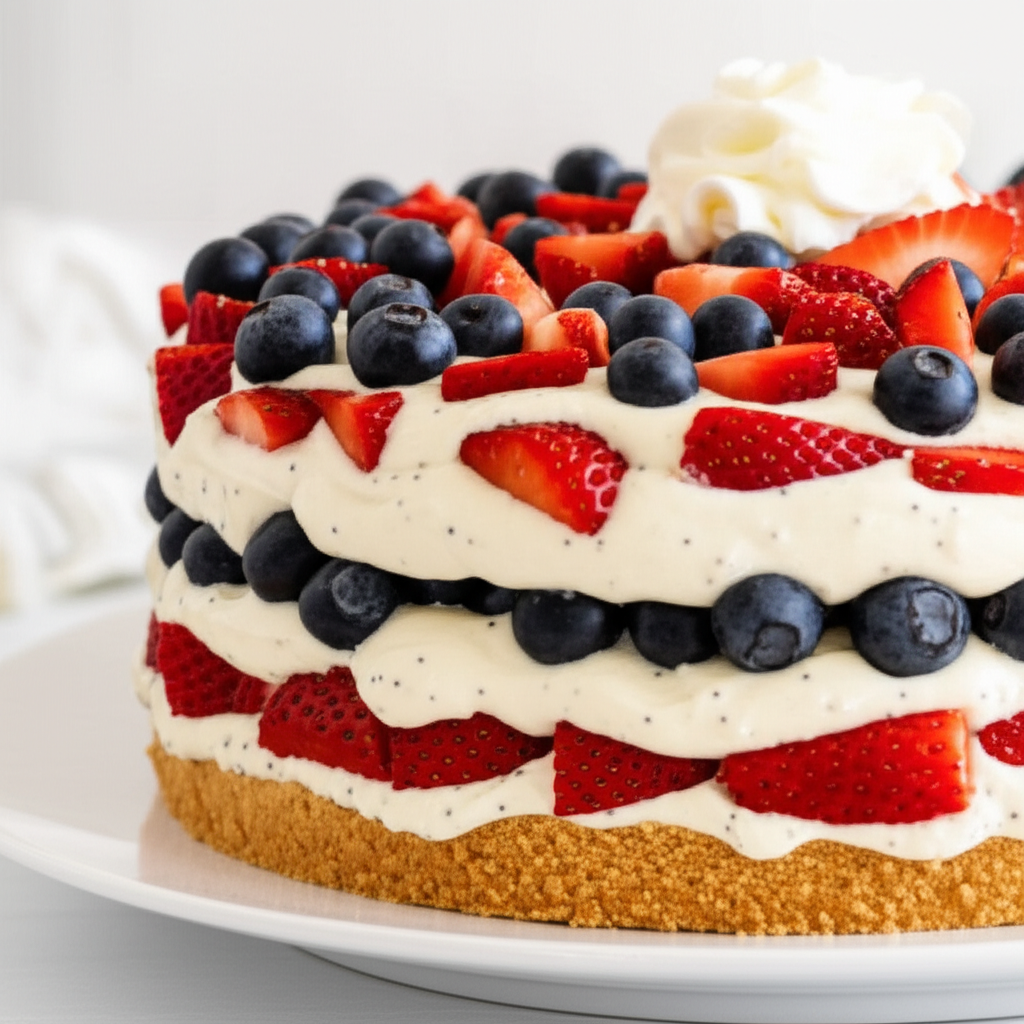
Ingrédients pour Summer Berry Pie
- 1 ½ cups graham cracker crumbs
- ¼ cup granulated sugar + 2 tablespoons powdered sugar
- Unsalted Butter
- Raspberries
- Blackberries
- Blueberries
- Granulated Sugar
- 2 tablespoons cornstarch
- pinch of salt
- 1 tablespoon lemon juice
- 2 tablespoons red currant jelly (or apple jelly)
- Heavy Cream
- Vanilla Extract
Cook Smarter with Sous, Your Kitchen Companion
Missing an ingredient for this Summer Berry Pie? Need a perfect wine pairing or a healthy side dish idea? Don't guess—ask Sous! Your AI-powered sous-chef is ready to help you swap ingredients, adjust serving sizes, and discover flavor tips in seconds.
Comment préparer Summer Berry Pie
- **Prepare the Crust:** Preheat oven to 325°F (160°C). Adjust oven rack to the middle position.
- In a food processor, combine 1 ½ cups graham cracker crumbs, ¼ cup granulated sugar, and pulse until combined.
- Gradually add 6 tablespoons (3 ounces) melted unsalted butter, pulsing until the mixture resembles wet sand.
- Press the crumb mixture into a 9-inch glass pie plate, using a ½-cup dry measuring cup to create an even crust. Use your thumb to square off the top edge.
- Bake for 15-18 minutes, or until fragrant and lightly golden. Transfer to a wire rack to cool completely.
- **Make the Berry Filling:** Rinse 4 cups mixed berries (combination of blackberries, raspberries, and blueberries; or substitute with 3 cups raspberries and 3 cups blueberries if blackberries are unavailable) in a colander.
- Spread berries on a baking sheet lined with paper towels; pat dry. If using a salad spinner, line the basket with paper towels, add berries, and spin until dry.
- Puree 2 cups of the berries in a food processor until completely smooth (about 1 minute).
- Strain the puree through a fine-mesh sieve into a saucepan, pressing on the solids to extract maximum puree.
- In a small bowl, whisk together ¼ cup granulated sugar, 2 tablespoons cornstarch, and a pinch of salt. Whisk into the berry puree.
- Cook over medium heat, stirring constantly, until the mixture boils and thickens to a pudding-like consistency.
- Remove from heat; stir in 1 tablespoon lemon juice. Set aside to cool slightly.
- Meanwhile, gently toss the remaining 2 cups of berries with 2 tablespoons melted red currant jelly (or apple jelly).
- Pour the cooled berry puree into the cooled pie crust. Distribute the glazed berries evenly over the puree and gently press them in.
- Loosely cover the pie with plastic wrap and refrigerate for at least 3 hours, or up to 1 day, to allow the filling to set.
- **Make the Whipped Cream (optional):** Just before serving, beat 1 cup heavy cream, 2 tablespoons powdered sugar, and ½ teaspoon vanilla extract with an electric mixer on low speed until small bubbles form. Increase speed to medium, then high, beating until soft peaks form.
- Cut the pie into wedges and serve chilled, topped with whipped cream (optional).
Nutrition Information (Approximate per serving)
Sodium
4 g
Sugar
116g
Fat
57g
Carbs
14g