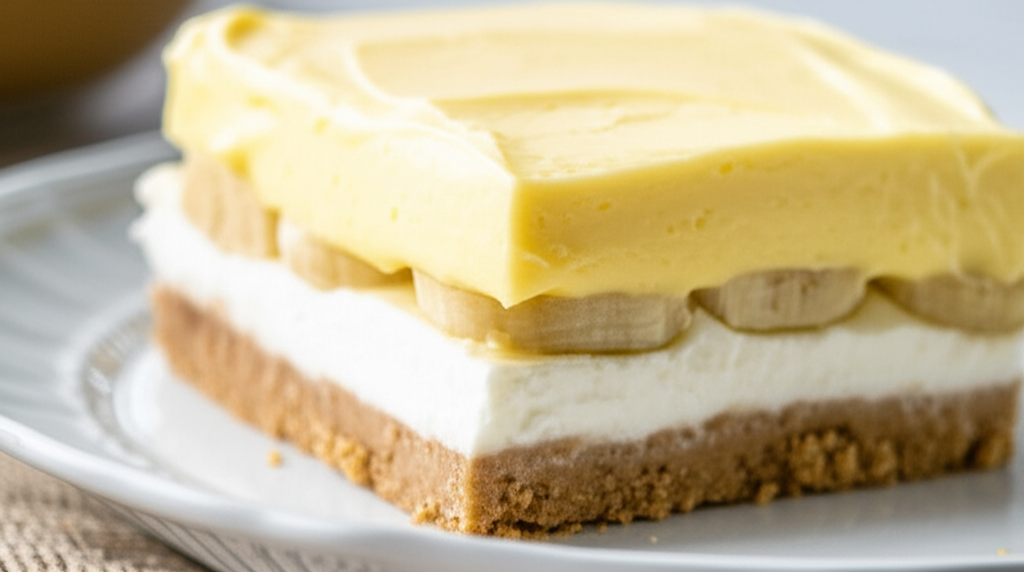

Ingredientes para Banana Cream Layer Dessert No Bake
- 1 1/2 cups graham cracker crumbs
- 2 tablespoons granulated sugar
- Cinnamon (not used in this recipe)
- 6 tablespoons butter, melted
- 1 (8 ounce) package cream cheese, softened
- 1/3 cup powdered sugar
- 4 cups thawed whipped topping
- 3-4 ripe bananas, sliced
- Jello Gelatin (not used in this recipe, instant pudding mix is used instead)
- Half And Half Cream (not used in this recipe, milk is used for pudding)
- 1 (3.4 ounce) package instant vanilla pudding mix
- 2 cups milk
Cook Smarter with Sous, Your Kitchen Companion
Missing an ingredient for this Banana Cream Layer Dessert No Bake? Need a perfect wine pairing or a healthy side dish idea? Don't guess—ask Sous! Your AI-powered sous-chef is ready to help you swap ingredients, adjust serving sizes, and discover flavor tips in seconds.
Como fazer Banana Cream Layer Dessert No Bake
- Prepare an 11 x 7-inch baking pan by lining it with parchment paper (for easy removal).
- In a medium bowl, combine graham cracker crumbs (1 ½ cups), melted butter (6 tablespoons), and granulated sugar (2 tablespoons). Mix until well combined.
- Pat the crumb mixture evenly into the prepared baking pan. Press firmly to create a solid crust.
- Refrigerate the crust for at least 1 hour to firm up.
- Meanwhile, in a large bowl, beat cream cheese (8 ounces, softened) and powdered sugar (⅓ cup) with an electric mixer until smooth and creamy.
- Gently fold in 2 cups of thawed cool whip.
- Remove the chilled crust from the refrigerator.
- Spread the cream cheese mixture evenly over the crust.
- Return the pan to the refrigerator.
- In a medium saucepan over medium heat, prepare the instant pudding mix according to package directions. (typically requires milk, check your brand). Let cool completely in the refrigerator for at least 1 hour to thicken.
- After 1 hour, slice 3-4 ripe bananas into ½-inch thick rounds.
- Remove the dessert from the refrigerator.
- Arrange the banana slices evenly over the cream cheese layer.
- Gently spread the prepared pudding over the bananas.
- Top with the remaining 2 cups of thawed cool whip.
- Refrigerate for at least 2 hours before serving to allow flavors to meld and the dessert to set completely.
Nutrition Information (Approximate per serving)
Sodium
23 g
Sugar
309g
Fat
190g
Carbs
33g


